
Mobile Erase, as the name suggests is safe to clear. It acts like its name, which can safely remove useless data files in your mobile phone, and thoroughly does it well. It supports the deletion of data including Messages, Call History, Facetime, Contacts, Mail, Calendar, Reminders, Notes, Voice Memos, Safari Bookmarks, Photos, Videos, Apps, System Settings, Keyboard Cache, Passbook, iTunes DB, iMessage, Safari Favorites, Safari History, Voicemail, Apple ID, iCloud ID, Game Center, Apple Maps, Weather, Stocks, Newsstand. So if you want to completely remove your contacts, it is no doubt that it can be done. In addition, it can optimize the storage space for your iOS device, clean up the cache and garbage for your iOS device.
Then I will introduce how to completely remove contacts on the phone.
Permanently Delete Contacts on iPhone 6/6 Plus/6S/6S Plus Without Restored
Step 1. Please delete the files you want to completely clear on your mobile phone, such as contacts.

Step 2. Download and install Mobile Erase on your computer. Then run it. At the same time, your iPhone need to be connected to the computer with its USB line.


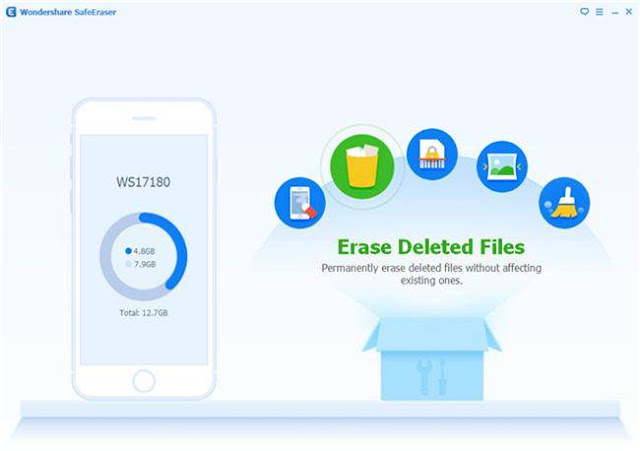
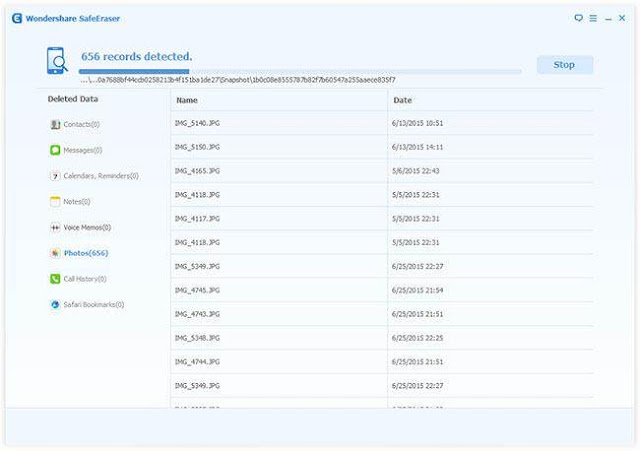
Step 3. At this point, the program interface as shown below. Please click on the second icon "Erase Deleted Files". Then, the program will automatically scan the files you have deleted and displayed in the window.
Step 4. Please selects your file to delete and check it. Click on the lower right corner of the "Erase Now" and go on.
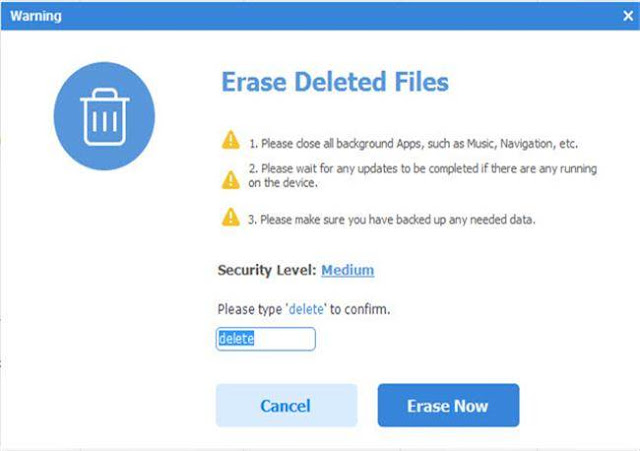
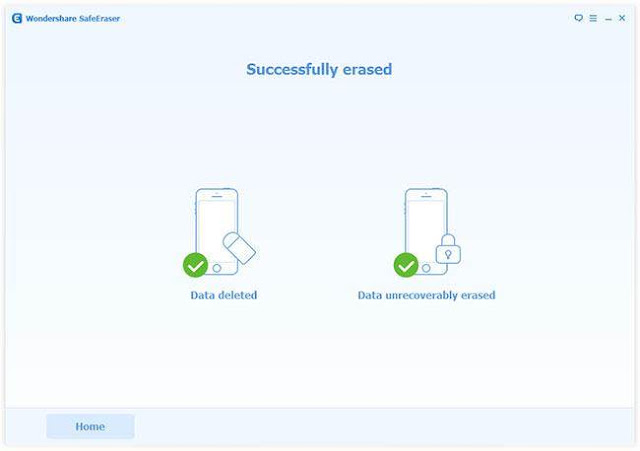
Here, the program will ask you to type "delete" on the text box to confirm the deletion, after that, click "Erase". Then wait for a while, so the removal process can be completed.
Relevant Tutorials:
- Permanently Delete Text Messages on iPhone 5S
- Permanently Delete SMS from iPhone 6
- Permanently Delete Text Messages on iPhone 6S
- Permanently Delete WhatsApps Messages from iPhone
- Permanently Erase All Data on iPhone 5/5C/5S
- Permanently Delete Text Messages from iPhone 6S Plus
- Permanently Delete Call History from iPhone 6S/6S Plus
No comments:
Post a Comment